How to install and refill a Tork Centrefeed dispenser
Installing and refilling Tork Centrefeed dispensers is quick and straightforward when your employees follow the right steps. With just a few basic tools, they can securely mount any unit and help keep your facility stocked with essential hygiene and cleaning products. Our helpful guide walks them through the entire process, from installation to refilling, so your dispensers stay up and ready for use.
What is a Tork Centrefeed dispenser?
Tork Centrefeed Dispensers are designed for bustling businesses where reliable hand drying and surface wiping solutions are needed. Their free-flow release means users can grab the exact amount of product they need, minimising waste. Their modern design and practical features offer you a special range of benefits, including:
- Improvements in overall hygiene due to easy product access
- A lock mechanism to help prevent theft
- One-handed operation for easy use
- Free-flow dispensing for flexibility and cross-contamination control
These advantages make Tork Centrefeed dispensers a smart choice for high-demand environments.
How to install a Tork Centrefeed dispenser
Installing a Tork Centrefeed dispenser can be done in just five steps. Arming your cleaning and maintenance team with these instructions and the right roll of Tork Centrefeed paper, means your units can be mounted, loaded, and ready to use in minutes. Not to mention users at your facility will always have a reliable supply of paper for hand drying and surface wiping.What you'll need
To install a Tork Centrefeed dispenser, you will need:
- The dispenser itself (comes with mounting hardware, an installation template, and operating instructions)
- A measuring tape
- A pencil
- A Phillips head screwdriver
- A drill
Preparing to install
To install a Tork Centrefeed dispenser, you first need to choose a suitable place on the wall to mount it. It's useful to take the product dimensions into account for this step. You should also use a measuring tape to check if the dispenser will fit on the part of the wall you have chosen.5-step installation
1. Place the template on the wall
Place the paper template on the wall section where you want to mount the dispenser. Make sure that the template is level before drilling any holes. Keep in mind that there is a bubble inside the dispenser that indicates when the template is level — you can use this to help you keep it straight.
2. Drill the holes for the dispenser
Open the dispenser and, using your pencil, mark the drill hole positions on the wall through the template. Once marked, carefully drill all four holes, remove the template, and insert the supplied wall anchors.3. Mount the dispenser
To mount the dispenser to the wall, align its mounting slots with the anchors. Then, secure it to the wall using the provided screws and the screwdriver.
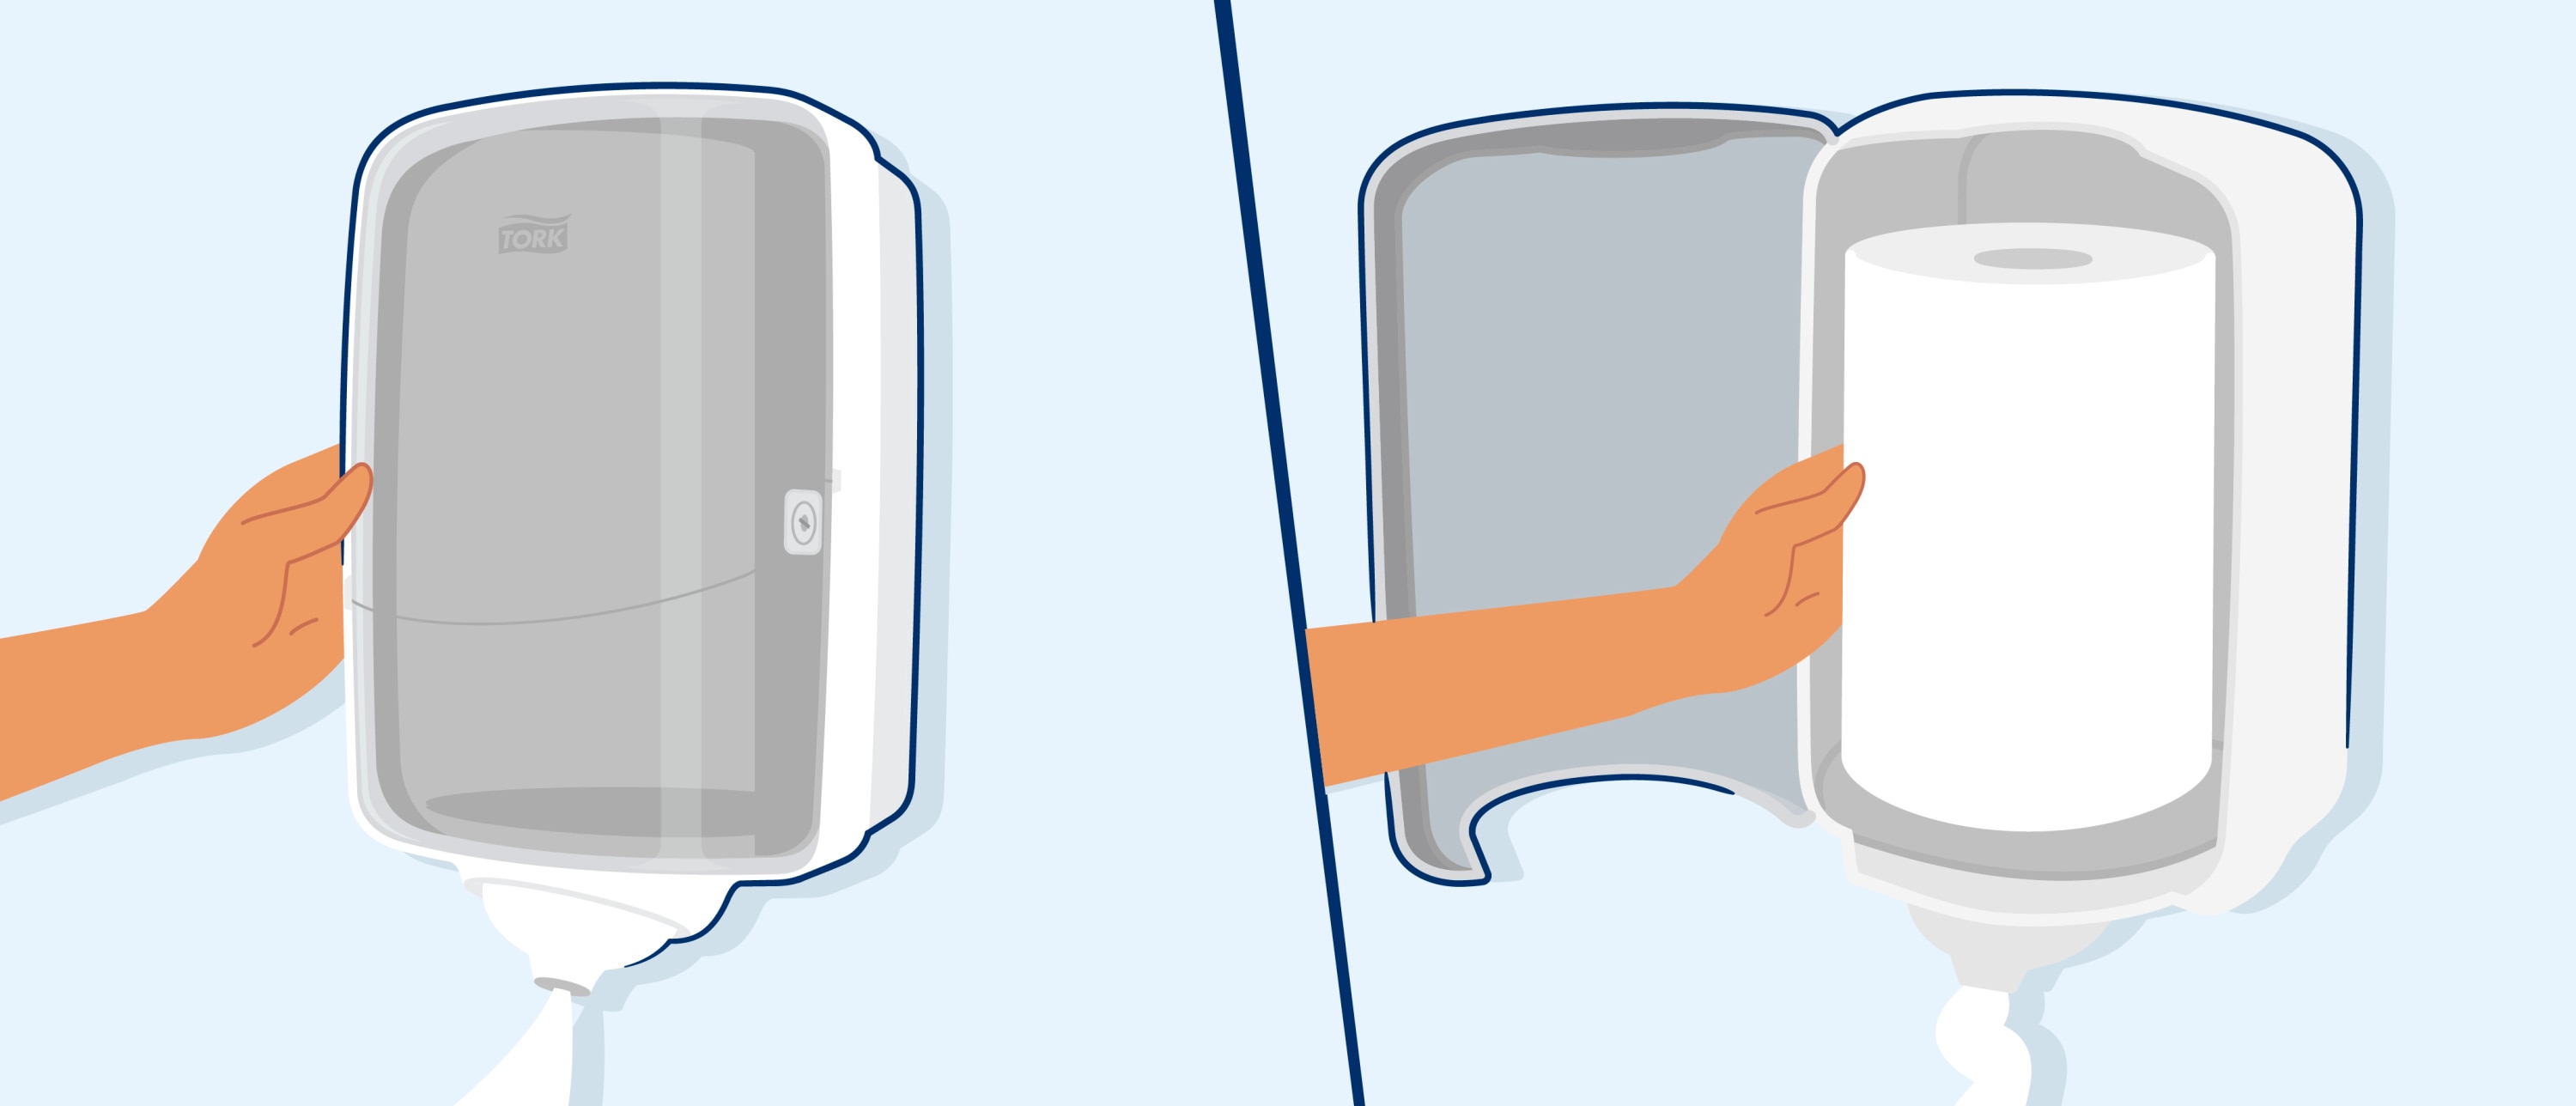
4. Load the Centrefeed roll
Be mindful of how proper loading prevents jams and keeps the paper from getting pinched or wasted. These steps will help you do that correctly and make sure product is always available for use:Unlock and open the dispenser
Use the key to unlock the unit and open the cover.Open the funnel door
If the funnel door is in the closed position, then push it to the left to open.Prepare the roll
Remove the cardboard core from a fresh Centrefeed roll.Insert the roll
Place the roll inside the dispenser and pull the paper in the middle through the opening in the funnel. Make sure it stays completely inside so it won’t get pinched between the door and funnel when closed.
Close the funnel door
Push the funnel door back into the closed position.5. Shut and lock the dispenser
Gently close the dispenser cover, checking that the paper isn’t caught between the cover and dispenser housing, then snap it shut and lock.How to refill a Tork Centrefeed dispenser
To refill a Tork Centrefeed dispenser, open the cover and funnel door. Next, remove any leftover pieces of paper inside. You can then continue with step four above to load the new roll.Extra refilling tips
- Always check for and clear away paper dust while the dispenser is open.
- Make sure the funnel and paper path are free from scraps or blockages before loading a new roll.
- Wipe the cover during refills to keep the dispenser looking clean.
- Only use cleaners that are safe for plastics to avoid
Now that you know how to train your staff on installing and caring for Tork Centrefeed dispensers in your facility, you can ensure units are kept in top condition and reduce the risk of breakdowns or replacements. If you want more guidance on installing Tork products in your facility, why not read our instructions on refilling a Tork Coreless toilet paper dispenser?